Virtual hand gesture mouse using a webcam

Overview

NonMouse

GitHub GitHub release (latest by date) zenn

日本語のREADMEはこちら

This is an application that allows you to use your hand itself as a mouse.
The program uses a web camera to recognize your hand and control the mouse cursor.

The video is available on Youtube

スクリーンショット 2021-09-13 午後5 33 21

スクリーンショット 2021-09-13 午後5 33 21

Feature

  • Entirely new mouse: a mouse with a software approach. It recognizes your hand and works as a mouse.
  • NonMouse can be invoked by the global hotkey even when this application is inactive.
  • Works well with typing
  • You can make it look like a touch display, by pointing the web camera at the display.
  • You can use the mouse wherever you want.
  • Just download from the latest release (windows, mac only)

Installation

📁 Run as executable file

Download the zip file that matches your environment from the latest release.

OR

🐍 Run as python

Run the following script.

$ git clone https://github.com/takeyamayuki/NonMouse
$ cd NonMouse
$ pip install -r requirements.txt

If you have trouble installing mediapipe, please visit the official website.

† For mac, you need to add the location where you want to run it, such as Terminal or VScode, to the Security and Privacy Accessibility and Cammera section in System Preferences.

Usage

1. Install a camera

The following three ways of placing the device are assumed.

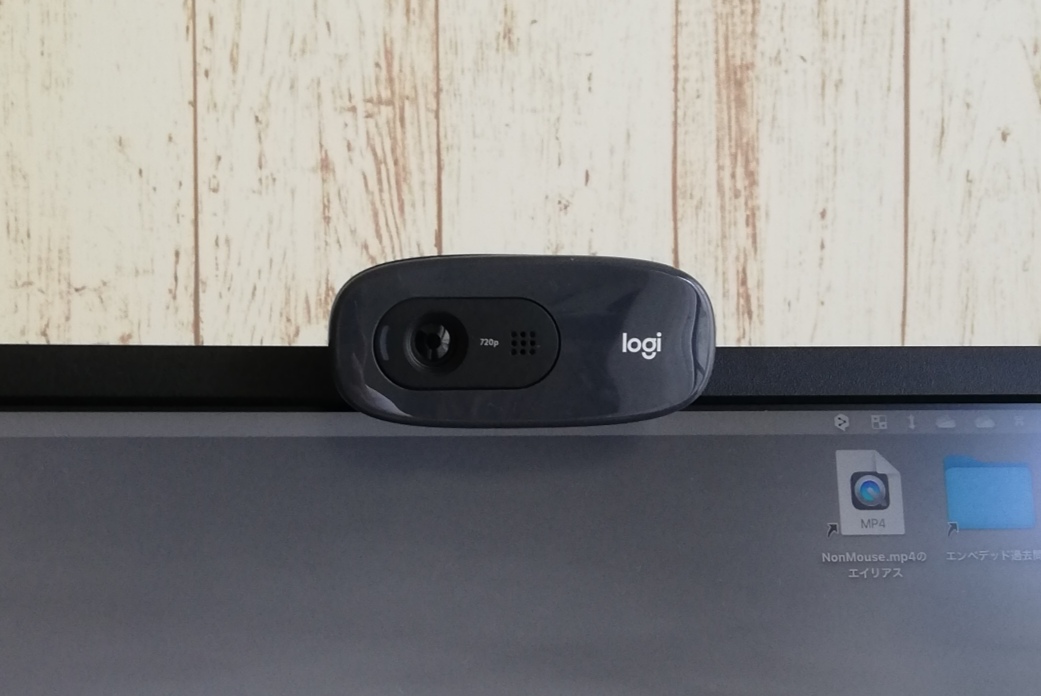
  • Normal: Place a webcam normally and point it at yourself (or use your laptop's built-in camera)

    Examples of installation methods Point the palm of your hand at the camera
    スクリーンショット 2021-09-13 午後5 33 21
    スクリーンショット 2021-09-13 午後5 33 21 スクリーンショット 2021-09-23 044041
  • Above: Place it above your hand and point it towards your hand.

    An example of installation methods Point the back of your hand at the camera.
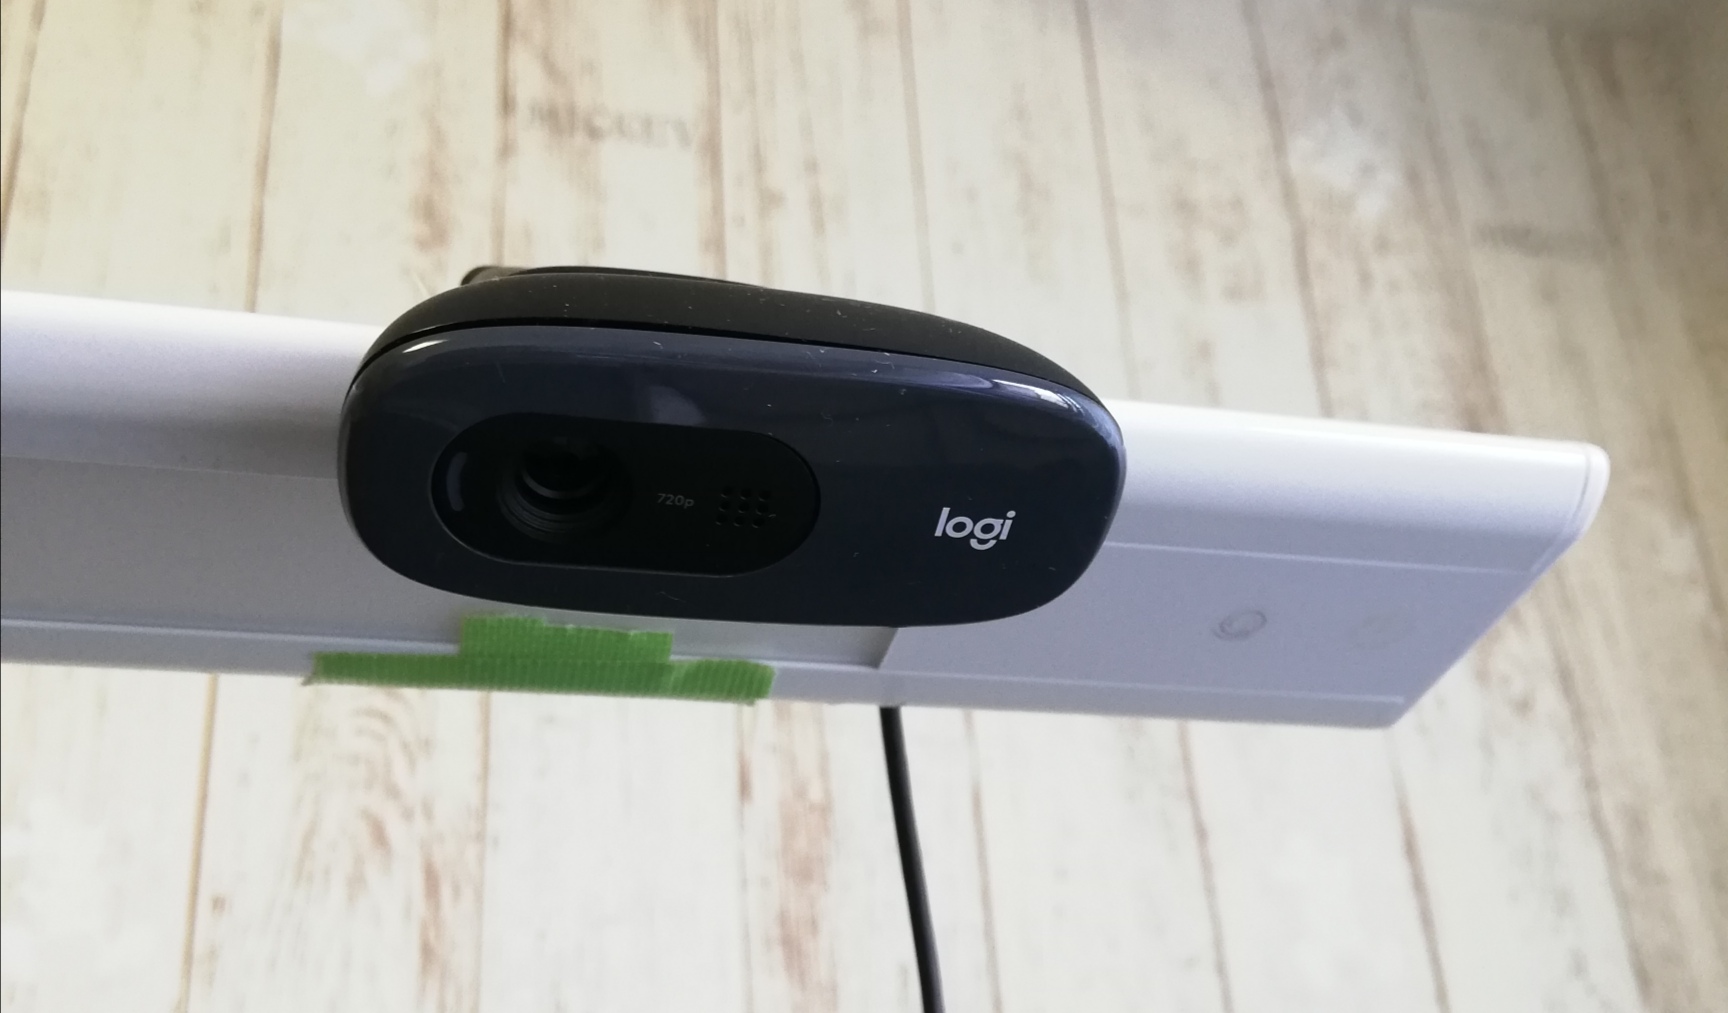
    スクリーンショット 2021-09-13 午後5 33 21 スクリーンショット 2021-09-23 044243
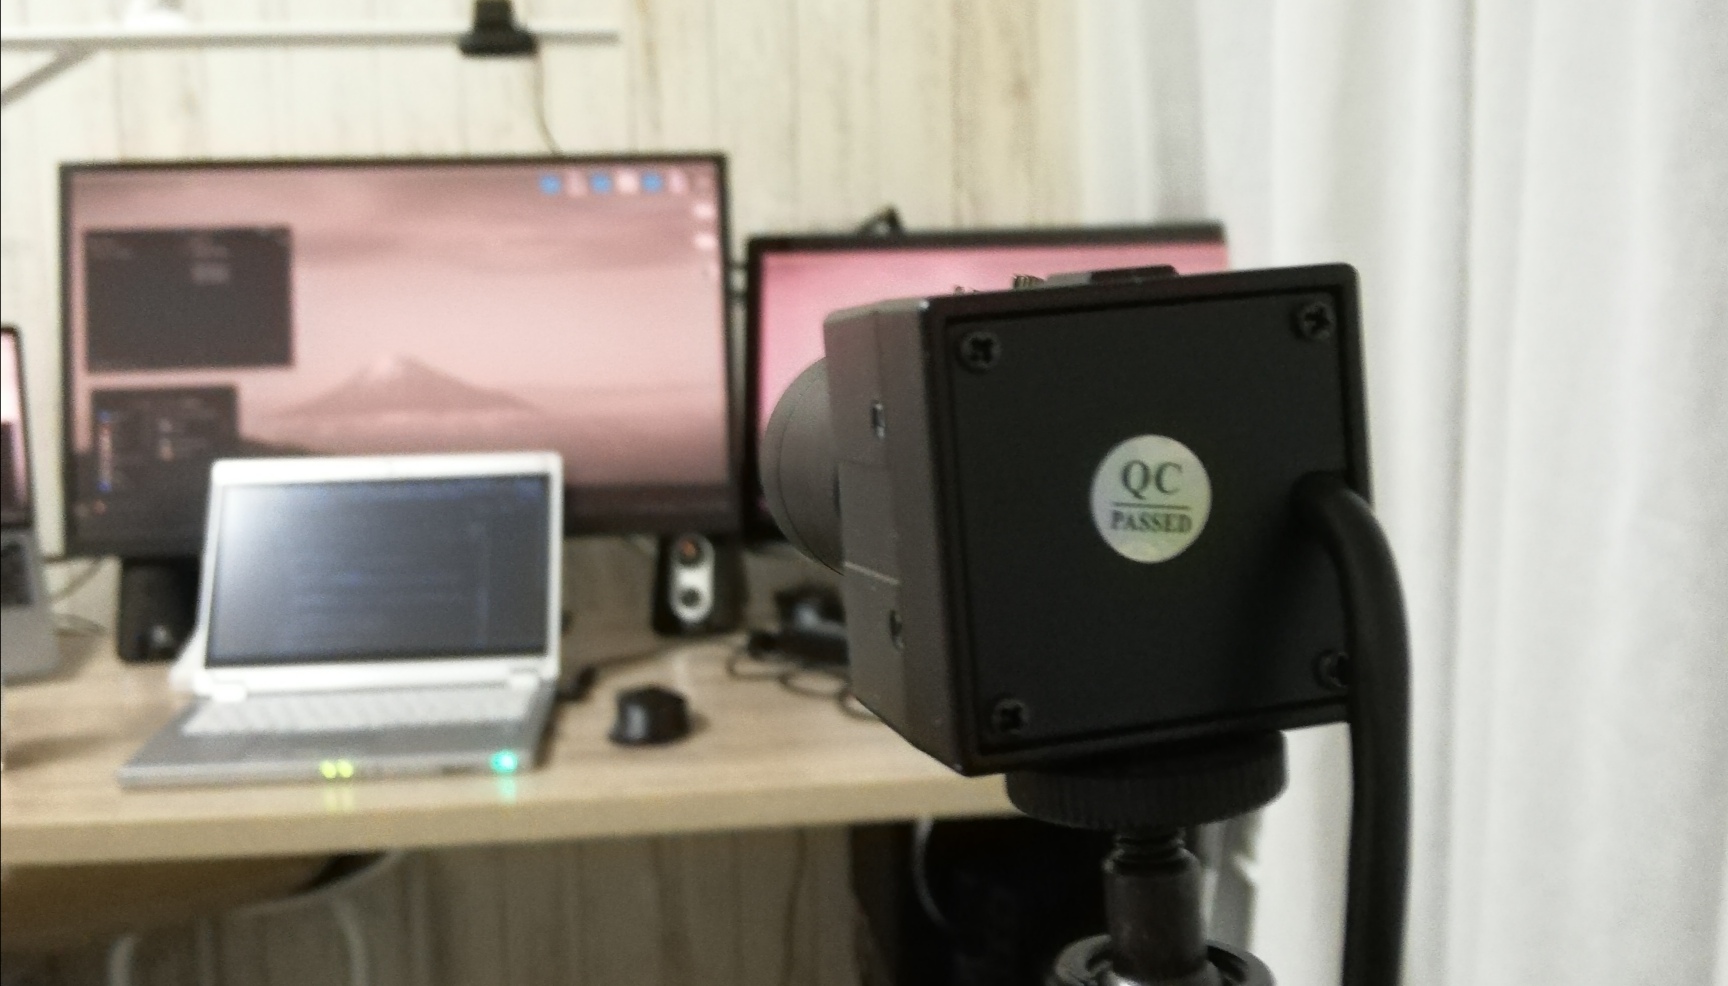
  • Behind: Place it behind you and point it at the display.

    An example of installation methods Point the back of your hand at the camera.
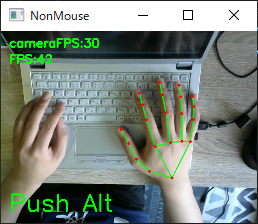
    スクリーンショット 2021-09-13 午後5 33 21 スクリーンショット 2021-09-23 044403

2. Run

  • Run the executable as described in the GitHub wiki.

    OR

  • Run the following script from the continuation of the installation.

    For windows, linux(global hotkey function does not work in linux.)

    $ python3 app.py

    For MacOS, you need execute permission.

    $ sudo python3 app.py

3. Settings

When you run the program, You will see a screen similar to the following. On this screen, you can set the camera and sensitivity.

スクリーンショット 2021-12-02 154251

  • Camera
    Select a camera device. If multiple cameras are connected, try them in order, starting with the smallest number.

  • How to place
    Select the location where you placed the camera. Place the camera in one of the following positions: Normal, Above, Behind in [ 📷 Install a Camera].

  • Sensitivity
    Set the sensitivity. If set too high, the mouse cursor will shake slightly.

When you are done with the settings, click continue. The camera image will then be displayed, and you can use NonMouse with the settings you selected.

4. Hand Movements

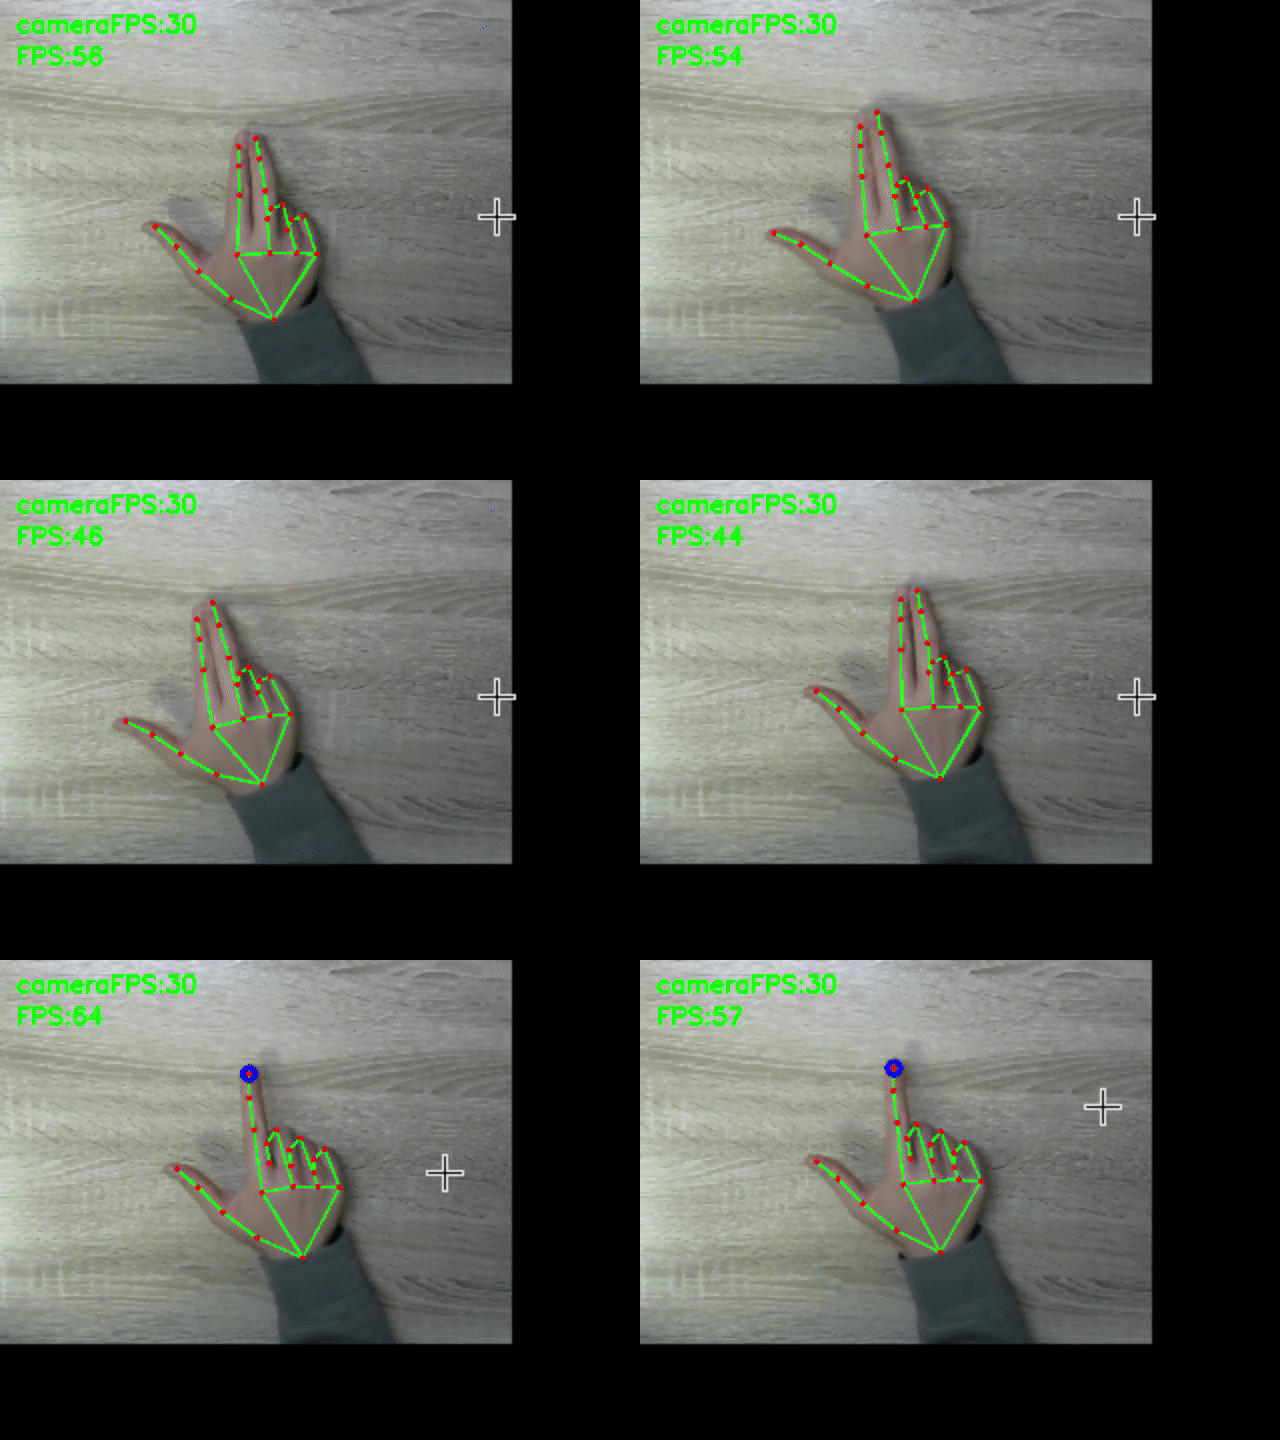
stop cursor left click right click scroll
aaa aaa aaa aaa

The following hand movements are enabled only when you hold down Alt(Windows), Command(MacOS). You can define your own global hotkeys by rewriting here. You can use this function even if the window is not active.This feature is only available on windows and mac.

  • cursor
    • Mouse cursor: tip of index finger → A blue circle will appear at the tip of your index finger.
    • Stop mouse cursor: Attach the tip of your index finger to the tip of your middle finger. → The blue circle disappears.
  • left click
    • Left click: Attach the fingertips of your thumb to the second joint of your index finger → A yellow circle will appear on the tip of your index finger.
    • Left click release: Release the thumb fingertip and the second joint of the index finger. → The yellow circle disappears.
    • Double click: Left click twice within 0.5 seconds.
  • other
    • Right click: Hold the click state for 1.5 second without moving the cursor. → A red circle will appear at the tip of your index finger.
    • Scroll: Scroll with the index finger with the index finger folded → a black circle will appear.

† Use it with a bright light at hand.
† Keep your hand as straight as possible to the camera.

5. Quit

Press Ctrl+C, when a terminal window is active.
Press close button(Valid only on windows, linux) or Esc key, when an application window is active.

Build

† The built binary files can be downloaded from latest realease.

In app-mac.spec and app-win.spec, change pathex to fit your environment.
Run the following scripts for each OS.

  • windows

    Copy and paste the location obtained by pip show mediapipe into datas, referring to what is written originally.
    Run the following script.

    $ pip show mediapipe
    ...
    Location: c:\users\namik\appdata\local\programs\python\python37\lib\site_packages
    ...
    #Copy and paste into the datas in app-win.spec
    $ pyinstaller app-win.spec
    ... ````
  • mac

    Create a venv environment and perform pip install, because the directory specified in datas is for an assumed venv environment.

    $ python3 -m venv venv
    $ . venv/bin/activate
    (venv)$ pip install -r requirements.txt
    (venv)$ pyinstaller app-mac.spec
Comments
  • error: PyObjC requires macOS to build

    error: PyObjC requires macOS to build

    Hello. When installing requirements on Linux I get this error:

    Collecting pyobjc-core==7.3
      Downloading pyobjc-core-7.3.tar.gz (684 kB)
         ━━━━━━━━━━━━━━━━━━━━━━━━━━━━━━━━━━━━━━━━ 684.2/684.2 KB 5.4 MB/s eta 0:00:00
      Preparing metadata (setup.py) ... error
      error: subprocess-exited-with-error
      
      × python setup.py egg_info did not run successfully.
      │ exit code: 1
      ╰─> [2 lines of output]
          running egg_info
          error: PyObjC requires macOS to build
          [end of output]
      
      note: This error originates from a subprocess, and is likely not a problem with pip.
    error: metadata-generation-failed
    
    × Encountered error while generating package metadata.
    ╰─> See above for output.
    
    opened by jbrepogmailcom 2
  • ZeroDivisionErrorでクラッシュする

    ZeroDivisionErrorでクラッシュする

    cfps = int(cap.get(cv2.CAP_PROP_FPS)) でcfpsが1になって if cfps < 30: cap.set(cv2.CAP_PROP_FRAME_WIDTH, cap_width) cap.set(cv2.CAP_PROP_FRAME_HEIGHT, cap_height) cfps = int(cap.get(cv2.CAP_PROP_FPS)) を通してもcfpsが1になり、 ran = int(cfps/10) でranが0になってしまい、ZeroDivisionErrorでクラッシュします。

    環境は以下の通りです PC: MacBook Pro 2020 Intel OS: macOS Monterey カメラ: Mac内蔵Webカメラ Pythonバージョン: 3.9.7

    opened by takpika 2
  • MacOS MontereyでカメラFPSが5Hz程度になる

    MacOS MontereyでカメラFPSが5Hz程度になる

    https://github.com/takeyamayuki/NonMouse/blob/1e7f7bc5e9f52a29196ae631b4cb7e83a910aa27/app.py#L117-L121

    cfps = int(cap.get(cv2.CAP_PROP_FPS))で取得するカメラのFPSが5Hzになってしまい、カーソルが小刻みに揺れてしまう。 これは恐らく、cv2の問題だと思われる。

    opened by takeyamayuki 0
  • How to set screen size?

    How to set screen size?

    Hello the mouse only works on left two thirds of the screen. I gues it has something to do with screen size, my lapto has 1920x1080. Can I reconfigure it somewhere?

    opened by jbrepogmailcom 1
  • カメラや手が傾くと、自分の指先移動量に対するマウス移動量が異なってしまう

    カメラや手が傾くと、自分の指先移動量に対するマウス移動量が異なってしまう

    たとえば、カメラを斜めに取り付けると、カメラに映る指は縦方向に圧縮されたものになり、当然移動量もその分小さくなる。 現在の自分の環境だと手に向けてまっすぐ取り付けられているので問題はないが、初めて使う人にとってはこのアプリケーションを使う上での大きな壁となる。

    「解決策」 まず、基準となる指の関節座標を用意しておく。 その基準となる座標群と現在の座標群を比較して手の傾き具合を求める。 それによって、dx,dy変える

    opened by takeyamayuki 0
Releases(2.6.0)
EDPN: Enhanced Deep Pyramid Network for Blurry Image Restoration

EDPN: Enhanced Deep Pyramid Network for Blurry Image Restoration Ruikang Xu, Zeyu Xiao, Jie Huang, Yueyi Zhang, Zhiwei Xiong. EDPN: Enhanced Deep Pyra

69 Dec 15, 2022
Prototypical Networks for Few shot Learning in PyTorch

Prototypical Networks for Few shot Learning in PyTorch Simple alternative Implementation of Prototypical Networks for Few Shot Learning (paper, code)

Orobix 835 Jan 08, 2023
A python interface for training Reinforcement Learning bots to battle on pokemon showdown

The pokemon showdown Python environment A Python interface to create battling pokemon agents. poke-env offers an easy-to-use interface for creating ru

Haris Sahovic 184 Dec 30, 2022
AutoDeeplab / auto-deeplab / AutoML for semantic segmentation, implemented in Pytorch

AutoML for Image Semantic Segmentation Currently this repo contains the only working open-source implementation of Auto-Deeplab which, by the way out-

AI Necromancer 299 Dec 17, 2022
GoodNews Everyone! Context driven entity aware captioning for news images

This is the code for a CVPR 2019 paper, called GoodNews Everyone! Context driven entity aware captioning for news images. Enjoy! Model preview: Huge T

117 Dec 19, 2022
Graph Self-Supervised Learning for Optoelectronic Properties of Organic Semiconductors

SSL_OSC Graph Self-Supervised Learning for Optoelectronic Properties of Organic Semiconductors

zaixizhang 2 May 14, 2022
PatrickStar enables Larger, Faster, Greener Pretrained Models for NLP. Democratize AI for everyone.

PatrickStar: Parallel Training of Large Language Models via a Chunk-based Memory Management Meeting PatrickStar Pre-Trained Models (PTM) are becoming

Tencent 633 Dec 28, 2022
"NAS-Bench-301 and the Case for Surrogate Benchmarks for Neural Architecture Search".

NAS-Bench-301 This repository containts code for the paper: "NAS-Bench-301 and the Case for Surrogate Benchmarks for Neural Architecture Search". The

AutoML-Freiburg-Hannover 57 Nov 30, 2022
PyTorch implementation for STIN

STIN This repository contains PyTorch implementation for STIN. Abstract: In single-photon LiDAR, photon-efficient imaging captures the 3D structure of

Yiweins 2 Nov 22, 2022
CSKG is a commonsense knowledge graph that combines seven popular sources into a consolidated representation

CSKG: The CommonSense Knowledge Graph CSKG is a commonsense knowledge graph that combines seven popular sources into a consolidated representation: AT

USC ISI I2 85 Dec 12, 2022
Repository for the "Gotta Go Fast When Generating Data with Score-Based Models" paper

Gotta Go Fast When Generating Data with Score-Based Models This repo contains the official implementation for the paper Gotta Go Fast When Generating

Alexia Jolicoeur-Martineau 89 Nov 09, 2022
GCC: Graph Contrastive Coding for Graph Neural Network Pre-Training @ KDD 2020

GCC: Graph Contrastive Coding for Graph Neural Network Pre-Training Original implementation for paper GCC: Graph Contrastive Coding for Graph Neural N

THUDM 274 Dec 27, 2022
Deepparse is a state-of-the-art library for parsing multinational street addresses using deep learning

Here is deepparse. Deepparse is a state-of-the-art library for parsing multinational street addresses using deep learning. Use deepparse to Use the pr

GRAAL/GRAIL 192 Dec 20, 2022
Implementation for "Conditional entropy minimization principle for learning domain invariant representation features"

Implementation for "Conditional entropy minimization principle for learning domain invariant representation features". The code is reproduced from thi

1 Nov 02, 2022
[ICLR 2022 Oral] F8Net: Fixed-Point 8-bit Only Multiplication for Network Quantization

F8Net Fixed-Point 8-bit Only Multiplication for Network Quantization (ICLR 2022 Oral) OpenReview | arXiv | PDF | Model Zoo | BibTex PyTorch implementa

Snap Research 76 Dec 13, 2022
OpenVINO黑客松比赛项目

Window_Guard OpenVINO黑客松比赛项目 英文名称:Window_Guard 中文名称:窗口卫士 硬件 树莓派4B 8G版本 一个磁石开关 USB摄像头(MP4视频文件也可以) 软件(库) OpenVINO RPi 使用方法 本项目使用的OPenVINO是是2021.3版本,并使用了

Tango 6 Jul 04, 2021
A collection of easy-to-use, ready-to-use, interesting deep neural network models

Interesting and reproducible research works should be conserved. This repository wraps a collection of deep neural network models into a simple and un

Aria Ghora Prabono 16 Jun 16, 2022
A simple version for graphfpn

GraphFPN: Graph Feature Pyramid Network for Object Detection Download graph-FPN-main.zip For training , run: python train.py For test with Graph_fpn

WorldGame 67 Dec 25, 2022
TensorFlow2 Classification Model Zoo playing with TensorFlow2 on the CIFAR-10 dataset.

Training CIFAR-10 with TensorFlow2(TF2) TensorFlow2 Classification Model Zoo. I'm playing with TensorFlow2 on the CIFAR-10 dataset. Architectures LeNe

Chia-Hung Yuan 16 Sep 27, 2022